


Overview
In this blog post, we will be creating templates for our authentication system. We will be creating a base template that will contain the common elements of all the templates and then we will create other templates which inherit from the base template. We will be creating templates for logging users in and registration forms for different user types.
Getting started
Update settings, to let Django know where to find templates & static files(CSS, Js, etc.)
Create a base template
Create other templates
Adding CSS
Django Templating Language Basics
Preview of Templates
Updating the core/settings.py
Firstly we will add the path of our templates to core/settings.py. We will create a folder named 'templates' in the project root where we will store the templates. We will also create separate subfolders for different apps.
Open the
core/settings.pyGo to
TEMPLATESsettingsAdd 'templates/' to the
DIRSkeyAdd
STATIC_ROOTsettingsAdd
STATICFILES_DIRSsettings to list directories to search for static files# core/settings.py TEMPLATES = [ { 'BACKEND': 'django.template.backends.django.DjangoTemplates', # List of directories 'DIRS': ['templates/'], # Whether to search inside each app for templates 'APP_DIRS': True, 'OPTIONS': { 'context_processors': [ 'django.template.context_processors.debug', 'django.template.context_processors.request', 'django.contrib.auth.context_processors.auth', 'django.contrib.messages.context_processors.messages', ], }, }, ] STATIC_ROOT = 'collected_static/' # url used to refer files in STATIC_ROOT STATIC_URL = 'static/' # List of paths to look for static files STATICFILES_DIRS = [ 'static/' ]Note: DIRS is a list of paths for Django to look for templates. APP_DIRS tells Django to also look inside each app
Now Django will look for templates in the 'templates' folder in the project root and the templates folder inside each application.
It will also look for static files from directories in
STATICFILES_DIRS
Creating a base template
Create a simple HTML document and save it as base.html inside templates/authentication.
We have included some template tags for including static files and adding named placeholders which will be replaced when the actual web page will be rendered.
<!DOCTYPE html>
{%load static%}
<html lang="en">
  <head>
    <meta charset="UTF-8" />
    <meta http-equiv="X-UA-Compatible" content="IE=edge" />
    <meta name="viewport" content="width=device-width, initial-scale=1.0" />
    <title>{%block title%}{%endblock%}</title>
    <link href="{%static 'main.css'%}" rel="stylesheet">
  </head>
  <body>
    <div class="">
      {% if messages %}
        <div>
            <hr>
            {% for message in messages %}
            <center>{{ message }}</center>
            <hr>
            {% endfor %}
        </div>
      {% endif %}
        {%block content%}{%endblock%}
    </div>
  </body>
</html>
Creating the remaining templates
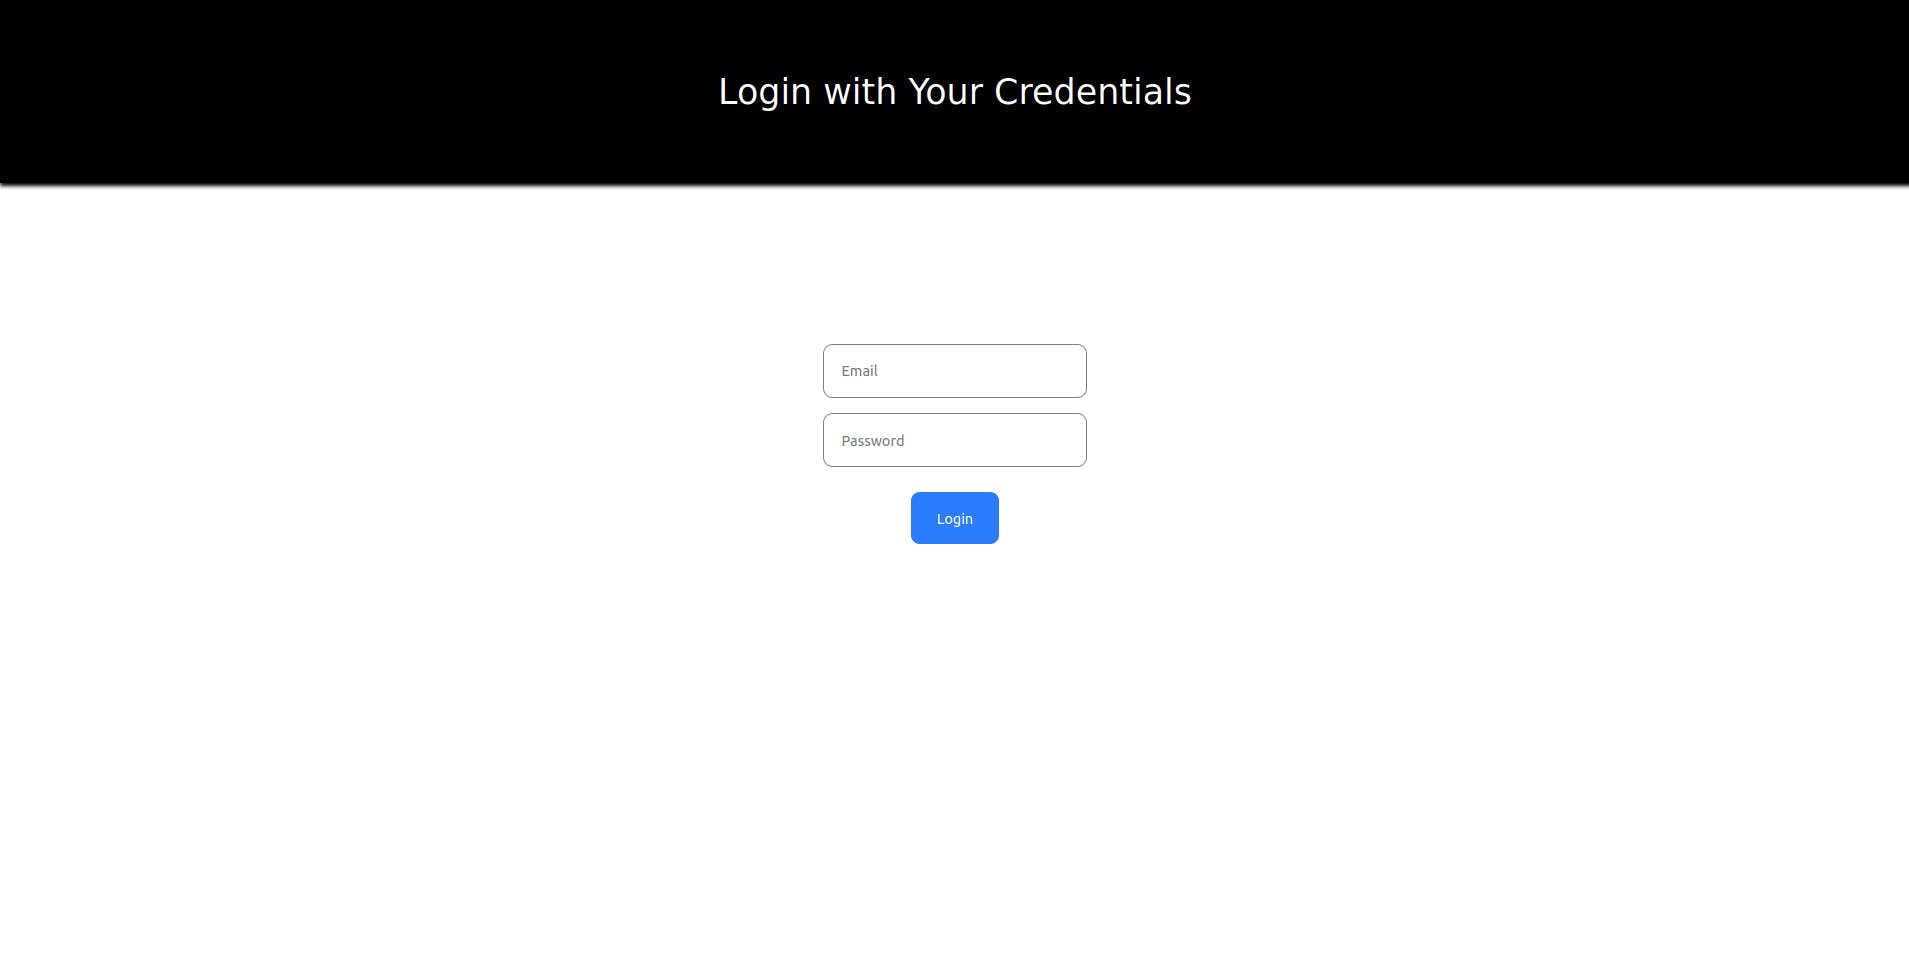
- Login Template
{%extends 'authentication/base.html'%}
{%block title%}Login{%endblock%}

{%block content%}
<center>
<div class="title black">Login with Your Credentials</div>
    <form class="form" method="post">
        {%csrf_token%}
        <input name="email" type="email" placeholder="Email" required>
        <input name="password" type="password" placeholder="Password" required>
        <input class="submit-button" type="submit" value="Login">
    </form>
</center>
{%endblock%}
Registration Template
In this template, we will be passing our CustomUserCreationForm which will be rendered automatically. Also, this template will be used to create two web pages. We will pass the creation form depending on user type to this template.
{%extends 'authentication/base.html'%}
{%block title%}Registration{%endblock%}

{%block content%}
    <center>
      <div class='title {%if title == "Teacher Registration" %} purple {% else %} blue {%endif%}'>{{title}}</div>
      <form class="form" method="post">
        {%csrf_token%}
        {%for field in form%}
        <div class="label">{{field.label}}</div>
        <div class="field">
        {{field}}
        </div>
        {%endfor%}
        <hr>
        <label for="confirmation">Check this box for confirmation</label>
        <input type="checkbox" name="confirmation" id="confirmation" required>
        <input class="submit-button" type="submit" value="Register" />
      </form>
    </center>
{%endblock%}
Adding CSS
Create a main.css in static folder in the project directory
/* static/main.css */
body {
  box-sizing: border-box;
  background-color: white;
  font-family: "Segoe UI", Tahoma, Geneva, Verdana, sans-serif;
  margin: 0;
}
input {
  padding: 1rem;
  margin: 0.5rem;
  border: none;
  outline: 1px solid grey;
  border-radius: 0.5rem;
}
input:focus {
  outline: 2px solid blue;
}
.title {
  font-size: 2rem;
  font-weight: lighter;
  font-family: "Segoe UI", Tahoma, Geneva, Verdana, sans-serif;
  padding: 4rem 0rem;
  color: white;
  box-shadow: 5px 3px 4px black;
}
.form {
  display: flex;
  flex-direction: column;
  justify-content: center;
  align-items: center;
  height: 60vh;
}
.label {
  padding: 0.5rem;
}

.submit-button {
  margin: 1rem;
  padding: 1rem 1.5rem;
  background-color: #2b7cff;
  color: white;
  outline: none;
  transition: all 0.3s ease-in-out;
}
.submit-button:hover {
  transform: scale(1.04);
}
.purple {
  background-color: #7323b5;
}
.blue {
  background-color: #0047ba;
}
.black {
  background-color: #000;
}

@media screen and (min-width: 480px) {
  .form {
    height: 55vh;
  }
}
hr{
    width:10rem;
}
Project Structure
Django Templating Language Basics
{% %}notation is used for statement{{ }}notation is used for expressions{%block name %}{%endblock%}: Placeholder that will be replaced when the template will be rendered on user request. We will change the title of the template using the title block and the body of the template using the content block. The rest of the template will remain the same.{{variable}}: you can access variables passed to the templates through a context dictionary.
For in-depth reading Official Django Templating Language Docs
Templates Preview
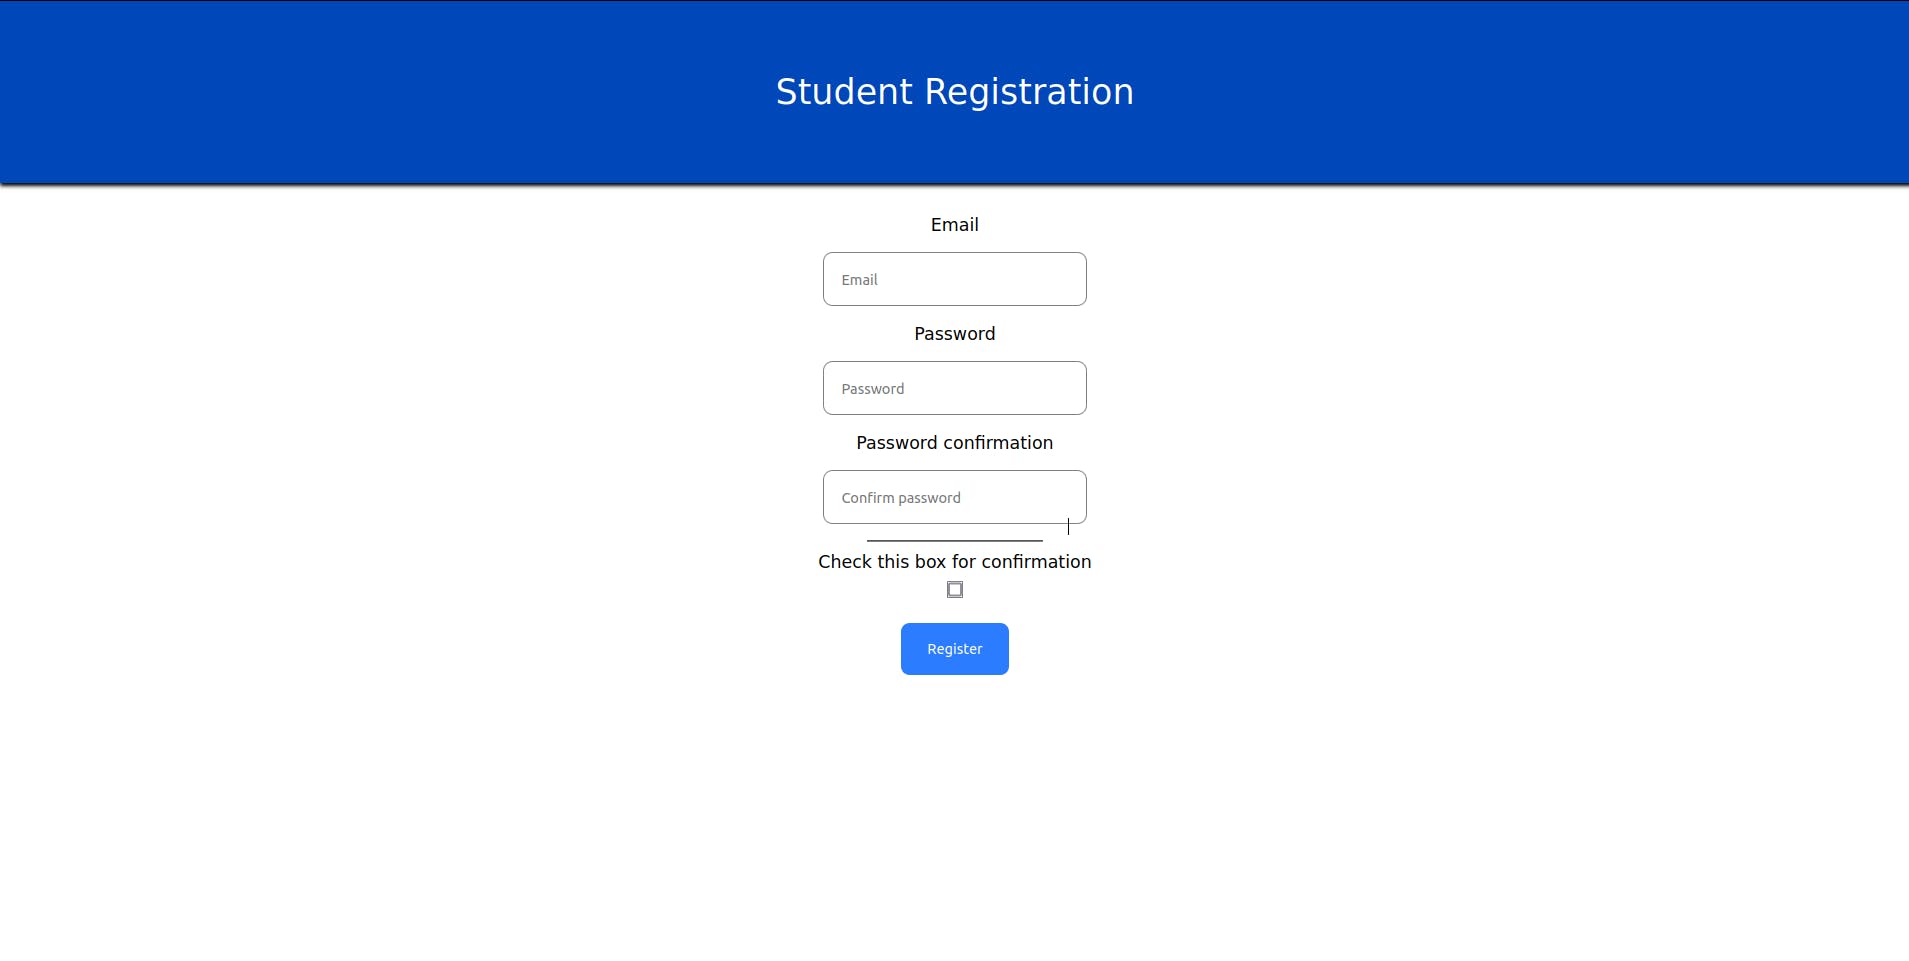
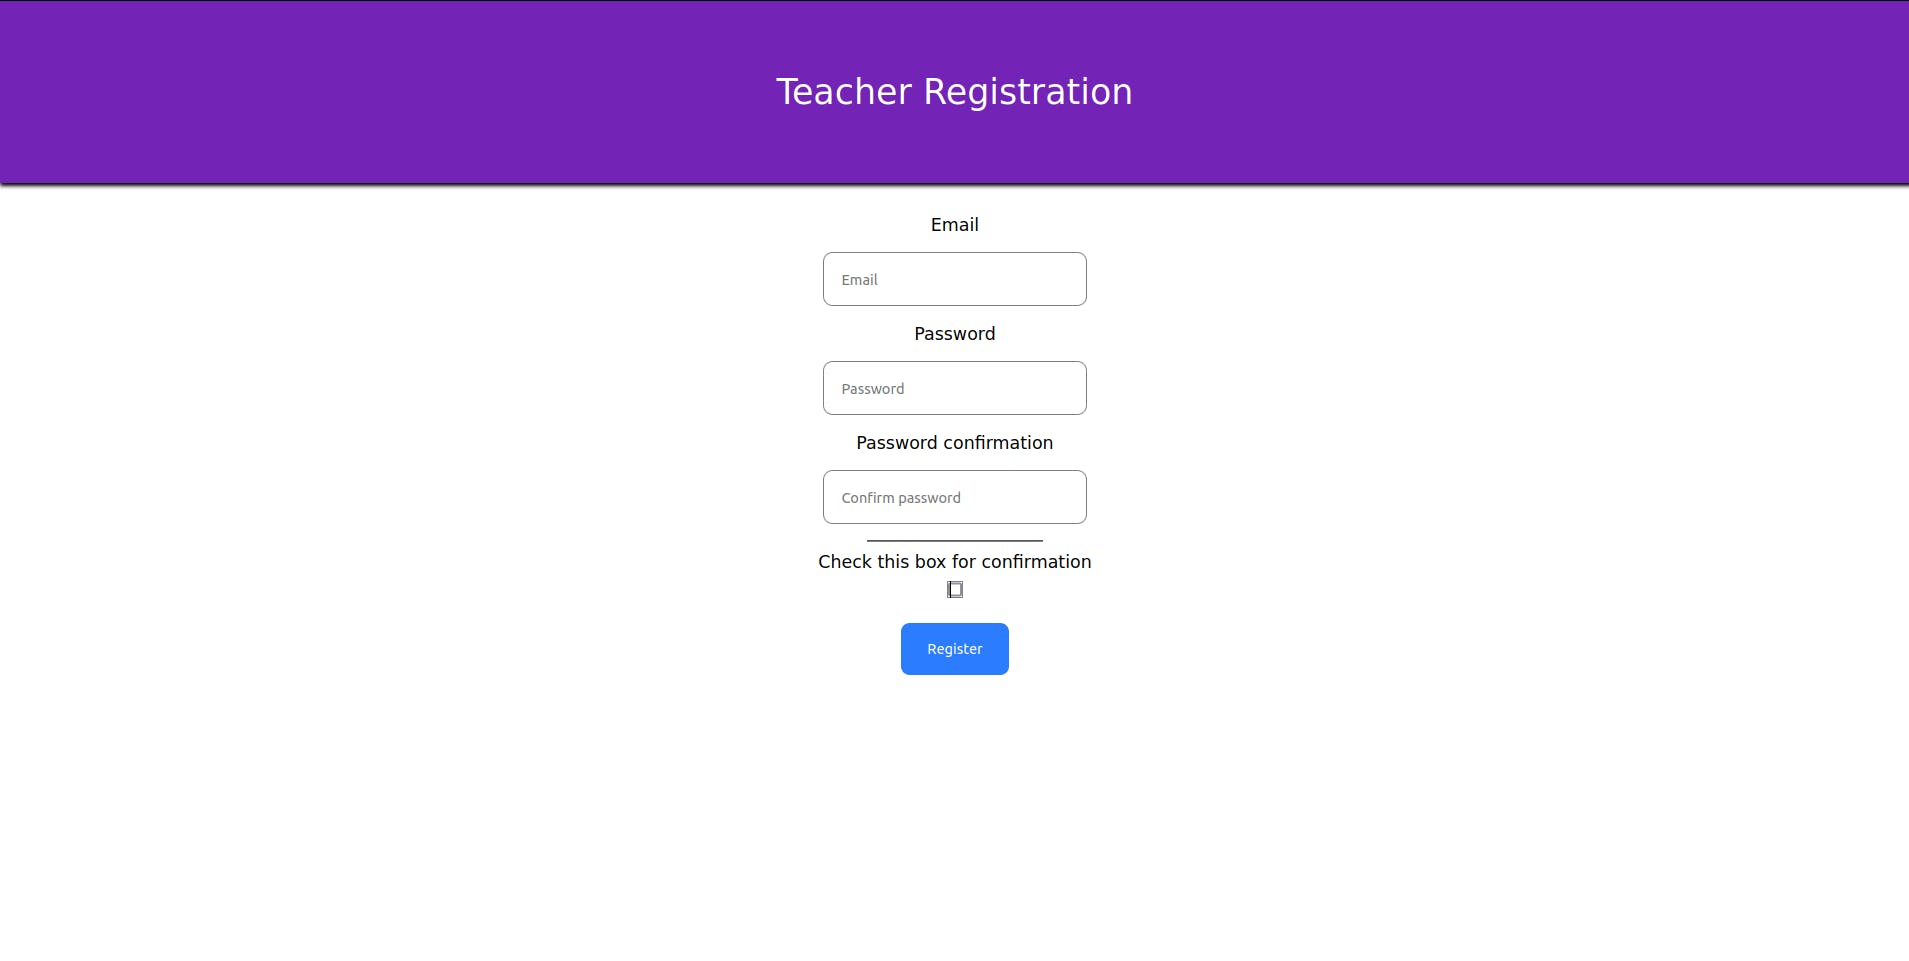
Now, these form templates are fully functional and you can add Students and Teachers using them.
Try starting the project by activating the virtual environment if not yet activated.
# for linux / macOS
source env/bin/activate
python3 manage.py runserver


# for windows
./env/Scripts/activate
python manage.py runserver
After starting the project try the following URLs
Conclusion
Now we have almost completed the authentication and registration part. We learned about templates and how we can define a template once to create any number of web pages with different data, as we have created a single template to render different forms. We also saw how to use static files like CSS in Django.
In the next blog, we will be creating a new app that will handle profile creation. From now on we will be quickly moving forward since we know how to define views, URLs and templates.
Like, Comment and Share
Your feedback will be really helpful for improvement. Feel free to connect and discuss technologies.
Happy Learning
References
Static Files Settings in Django